

| Home | Parent | ← Go → | Prior | Next |


There are several views in which you can tag, un-tag and revise tags in Smarky, Synkmark, Markster or BookMacster, including bulk operations for editing multiple tags or multiple bookmarks
There are several views in which you can tag, un-tag and revise tags in Smarky, Synkmark, Markster or BookMacster, including bulk operations involving multiple tags or bookmarks.
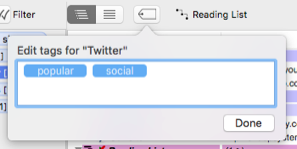
In the Content Tab, just below the toolbar, is the Tags button. Clicking it exposes the Tags Popover, in which you can view and edit tags of the bookmarks which are selected in the Content View.

You can add tags by typing into this popover, dragging tags from the Tags View, or delete tags by selecting one or more and hitting the delete key.
If you have more than one bookmark selected, Tags Popover shows the combined tags (union set) of all of the selected bookmarks. If you add a new tag, it will be applied to all bookmarks in the selection; similarly for deleting tags.
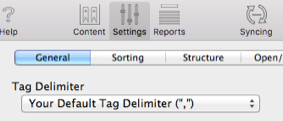
When typing in multiple tags, separate them with the Tag Delimiter that you have specified in the document’s Settings > General…

By default, it is set to Your Default Tag Delimiter, which in turn is set in Preferences > General. The idea here is that if you have multiple Collections, each document can have a different tag delimiter.
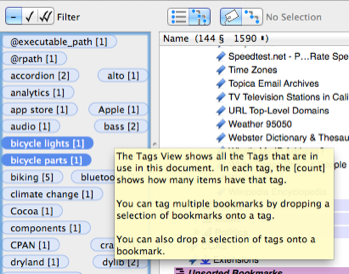
To the left of the Content View is the Tags View.

The tooltip (the box which you see when you hover the mouse over the Tags View, as in that screenshot), explains with the Tags View is and the short version of two cool things you can do in it. Here is a longer version…
You can select multiple bookmarks, using ⌘-click or shift-click as usual, and then drag the selection left to the Tags View, and drop them on a tag. All of the dropped bookmarks will be tagged with the the tag you drop them on. will all be so tagged.
You can also do the opposite, selecting multiple tags with ⌘-click or shift-click, and dropping them onto a bookmark. The bookmark will be tagged with all of the tags.
You can delete a tag, or a selection of tags, by selecting it, or them, in the Tags View and hitting the delete key.
You can rename or delete a tag by performing a secondary click (right/control click) on it in the Tags View and using the contextual menu which will appear.


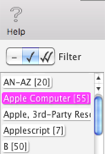
At the top left of the Content Tab, the Tag Filter switch filters items in the Main Content View to show only items which have a tag matching those which are selected in the Tags View just below it. The switch has three settings.
 Switching the Tag Filter to the dash deactivates it, so that the Main Content View is not be affected by the selection in the Tags View.
 Switching the Tag Filter to one checkmark will hide any items that do not have any of the tags selected in the Tags View.
 Switching the Tag filter two checkmarks will hide any items that do not have all of the tags selected in the Tags View.
If only one tag is selected, any and all are the same. In this case, the  and
and  settings have the same effect.
If necessary, “tag” the first bookmark you want tagged by selecting it in the Content, then activate the Detail view, enter the tag, then hit return.
Activate the Content and, using ⌘-click or shift-click, select all of the other bookmarks you want to have this tag.
Drag the selected items from the Content to the desired Tag in the Tags View.
Alternatively, if all of the target bookmarks currently have no tags, or have the same tags in the same order, you may select all of them in the Content and then add or remove tags as desired in the Detail View.
Activate the Tags View and select the several Tags you want by using using ⌘-click or shift-click.
Drag the selected tags to the desired bookmark in the Content.
You can manipulate tags of any single bookmark in the Inspector Panel. To get the Inspector Panel, hit the Inspector button at the right edge of the toolbar, or type ⇧⌘I.

| Home | Parent | ← Go → | Prior | Next |